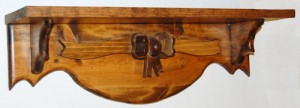
In this final article about the 24″ Ribbon and Bow Shelf, we will be assembling all the parts that were cut out in all the previous articles. The assembly process is fairly straightforward, however, there are a couple of points that will improve the appearance of the shelf.
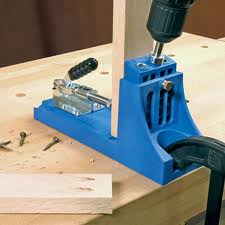
Pocket Screw Jig
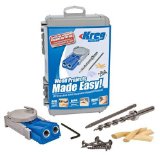
We will be assembling all the parts with screws so the shelf will be stronger and last longer. The type of screws I prefer to use are called pocket screws. Pocket screws are a special type of screw that are driven with a square tipped bit and fit into special pockets created by a pocket jig. A pocket jig clamps onto a piece of wood and has angled guide holes into which a special bit that comes with the jig is inserted. The holes created by the pocket jig are set at a very steep angle to the piece of wood.
The first operation that will be performed is to clamp the back plate in the pocket jig and drill three holes in the back of the plate at the top. These three hole will be used to attach the top of the shelf to the back plate.
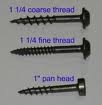
Pocket Screws
When you have drilled the three pocket holes in the back, place the top of the shelf flat on your work table. Now center the back plate at the rear, but on top of, the top shelf part and drive the three pocket screws into the pockets. This will secure the top of the shelf to the back plate.
Turn the shelf over and place the back of the shelf on the table. On the back plate, measure 2″ from the left and right ends and 2-1/2″ from the top and place a mark. Drill a 1/8″ hole at these two points. Take the two support braces and screw them in place by driving 1-1/2″ drywall screws through the back of the shelf into the two shelf braces. Drill a 1/8″ hole through the top of the shelf at the center point of each support brace, being careful not to drill into the support braces. In these same holes, drill a 3/8″ countersink hole 3/8″ deep. Drive a 1-1/2″ drywall screw into each support brace through the top.
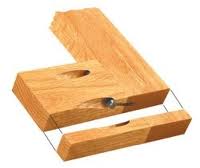
Pocket Holes
When you are satisfied with the fit of the pieces, remove the screws and place a small amout of glue at each joint and reassemble the pieces. Glue a 3/8″ plug that matches the wood you are using for the shelf in each of the 3/8″ holes in the top of the shelf. When the glue is dry, cut off and sand the plugs smooth. Attach the ribbon and bow assembly to the face of the back plate.
Stain the shelf to the desire stain color and let the stain sit for 5-8 minutes to give the stain time to soak into the wood. Now wipe the stain with a clean cloth to remove brush strokes and excess stain. Let the shelf dry overnight and apply a coat of satin polyurathane varnish to the entire shelf. When this coat is dry, sand the entire shelf with 600 grit sandpaper. Wipe the sanding dust from the shelf and apply a second coat of varnish.
 Congratulations, your shelf is now complete and ready to hang. Until next time, work hard, stay safe, and as always, thanks for stopping by MVB Crafts.
Regards,

P.S.
If you’re interested in building shelves using pocket screws, get your Pocket Screw Jig Set from Amazon. By clicking the link and purchasing through MVB Crafts, you’ll be helping to support this site and help us to continue bringing you quality content.
Thanks.

