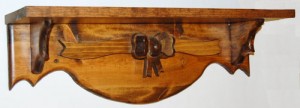
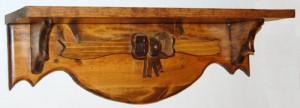
In our last article, I explained how to make the pattern and cut out the back plate for the 24″ Ribbon and Bow Shelf. In this article, I’ll explain how to create the pattern and cut out the shelf support pieces. These pieces are actually easier to cut than to make the pattern so let’s get started.
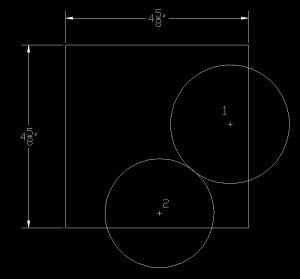
The two support braces for this shelf measure 4-5/8″ wide x 4-1/2″ high and are made from a piece of 1″ x 6″ material. But before we can start cutting, we first have to construct the pattern. Take the left over piece of poster board from the back plate and using a framing square, lay out a square that measures 4-5/8″ x 4-5/8″. Don’t cut it out yet because we need to draw some arcs and it will be easier to place the compass point on the sheet while it’s still attached to the rest of the poster board.
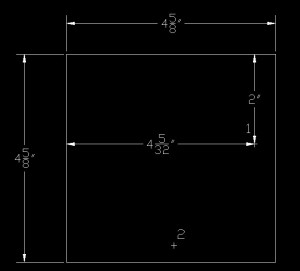
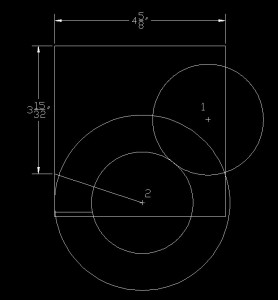
When you have drawn the square, take a ruler and measure 4-5/32″ from the left side of the box and place a mark inside the square. Now measure down 2″ from the top of the box and place a mark. These two points will intersect at Point #1 as on the illustration below.
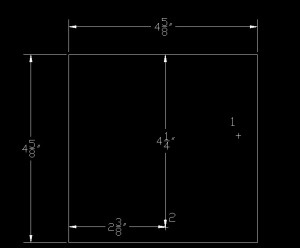
Now measure 2-3/8″ from the left side of the box and place a mark. Next measure 4-1/4″ from the top of the box and Point #2 falls at the intersection of these two points as in the illustration below.
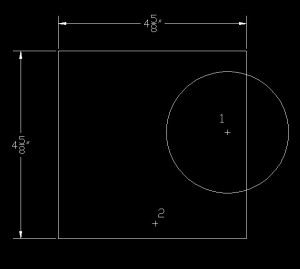
Now we need to draw two circles on the square that will form the two arcs on the shelf brace. First take your compass and set the radius to 1-1/2″, place the needle at point #1, and draw a circle as show in the illustration below. I’ve drawn a full circle in the illustration, but you only have to draw the portion of the circle that falls inside the square.
When this circle is drawn, set the compass to a radius of 1-3/8″, set the needle at point #2, and draw a circle as illustrated below.
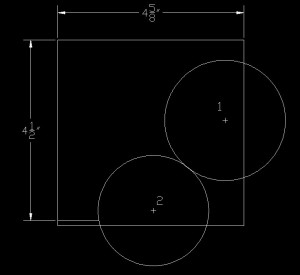
Now we need to shorten the left side so it matches our 4-1/2″ side measurement. Measure 4-1/2″ from the top of the square on the left side and place a mark. Take a framing square and draw a line from the left side toward the right side and stop the line where it intersects the circle at point two as illustrated below.
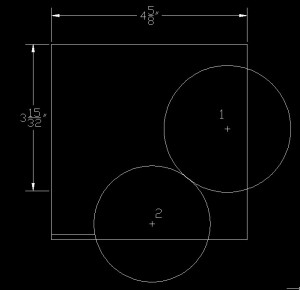
This next step sets up the center point for the small arc that will connect the circle at point #2 with the left edge of the brace. Measure down 3-15/32″ from the top on the left side of the square and place a mark as shown in the illustration below.
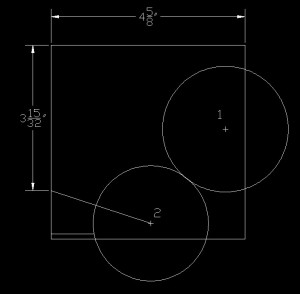
Now we need to draw a straight line from point #2 to the mark we just made as illustrated below.
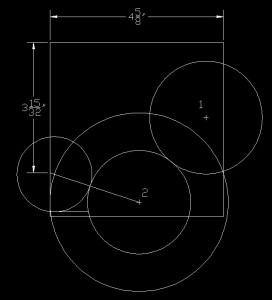
Now we need to draw another circle at point #2. Set the radius of your compass to 2-3/8″, set the needle at point #2, and draw a circle as shown in the illustration below.
This second circle drawn at point #2 intersects the angle line drawn from point #2 to the left side. Set the radius of your compass to 1″, place the needle at this intersection point and draw a circle as show below.
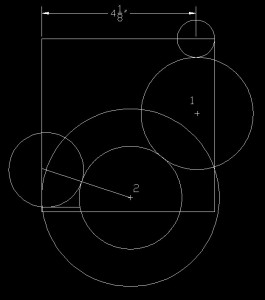
I know all these circles are beginning to get a little confusing but it will all be clear when we reach the end of the layout process. We have one more circle to draw and then we can begin cutting out the pattern. Measure 4-1/8″ from the left side at the top of the square and place a mark. Now set your compass to a radius of 1/2″, set the needle at the mark you just made, and draw a circle as illustrated below. This circle forms the arc that connects the top of the brace to the circle at point #1.
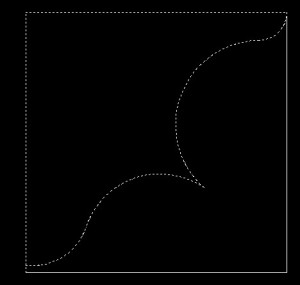
Now with these five circles drawn, it’s time to cut out the pattern. The next step is probably going to be hard but the illustration below shows exactly where to cut to get the pattern just right. If you have any problems figuring out just where to cut, print out the last two images and place the drawing of the cut lines over the top of the one with all the circles and that should help.
Once the pattern is cut out, take your scissors and round the point in the center of the brace where the circle at point #1 intersects with the circle at point #2 just slightly to prevent this tip from breaking off when the braces are finished.
Now all that’s left to do is to cut out, route, and sand the two braces. Do not route the straight sides of the brace since this is where the brace attaches to the shelf back plate and the top of the shelf. Be very careful to keep your hands away from the router bit when routing these two pieces. It’s best done with a router table if you have one.
Before we wrap up this article, take a piece of 1″ x 8″ wood and cut it to exactly 24″ long. This piece is the top of the shelf so all you need to do is sand this piece smooth with your random orbital sander.
In the next article, I will describe how to cut out the ribbon for the shelf. So stay tuned and as always, thanks for stopping by.

